As I have off from school this week, I plan on catching up on some baking I've been doing since school started. Last month, I didn't get a chance to make blueberry pie in class, so I decided to make one to bring to a friend's house for dessert. It turned out I had time to make it the week after in class as well, which pretty much makes me a blueberry pie pro now!
I received this nutrition food scale for Christmas last year, which was pretty good timing for all the scaling out of ingredients I've been doing in class. I just plop a bowl on the scale, tare it out, and add the ingredients to the bowl.

To make any kind of pie dough, you're going to toss some flour, butter and water together. This will always be in a 3:2:1 ratio, respectively, with a little salt in there for good measure. You'll start by measuring out your dry ingredients...

...and then cutting your fat into cubes. Here, I used butter, but you could also use shortening if you wish. I would strongly suggest butter though.

For some reason, I loved doing everything by hand here. I haven't even tried making pie dough in in a mixer yet. Since I've gotten my mixer, I've become quite obsessed with doing absolutely everything in it. I selfishly believe that I couldn't live without it now. But there is something about making pie dough that makes me feel that by using my bare hands, and crumbling up the butter into small pieces into the dry ingredients, it's going to make the crust taste that much better. It also makes me feel like I can skip my upper body workout at the gym that day! ;-)
Once you get the consistency of the flour, salt and butter mix to be crumbly, but still have quite a few small, pea-size nuggets of butter in there, you should add the water.

With the water added, you will want to continue to mix the dough until everything just comes together. This kind of pie dough is referred to as flaky pie dough. All that this means is that the crust will come out "flaky" (obviously)- the way to achieve this is to leave those pea-sized nuggets of butter in that crust! Yes! Visible butter = visible flakiness in dough = ultimate-in-your-mouth deliciousness! (I feel like I've known this for my entire life- but yes, it's only been 2 months. You, too, can be this knowledgeable and awesome at pie dough making if you continue reading on. What a pie dough snob I sound like!)

The recipe I have below here will yield approximately 3 lbs of pie dough. You'll want to divide the dough into three pieces, wrap them tightly in plastic saran wrap, and leave them refrigerated for at least 1 hour before rolling. Again, this essential step is all about those delicious, fatty pieces of butter in your crust! You'll want to keep them cold so they stay firm until you pop this crust in the oven- the firmer your butter pieces, the flakier your crust will be when you pop this baby in the oven.
You can go ahead and leave
this dough in your freezer for awhile, if you wanted to make a bunch of
dough ahead of time. Just make sure it's wrapped up tightly. Just thaw
the day you're ready to use it. Then roll it out, and plate it in a pie pan
like so. Again, you'll want to stick the pan back in the fridge, so the dough doesn't warm up and melt the pieces of butter at all. Don't underestimate a little warmth in the kitchen- save those firm butter pieces for the oven to flake up your crust!

For the blueberry pie, you'll use two thirds of the recipe here, so you'll have an extra piece of pie dough hanging around in case of an emergency. ;-) Again, the flaky pie dough you'll have here is best for flakier crusts- this includes crusts that will be baked with raw fruit filling (ie, apple pies), that won't be pre-baked (for example, you would pre-bake a pie shell before pouring in chocolate cream for a chocolate cream pie).
**********************************************************************************************************
Basic Pie Dough
makes 3 lbs
Ingredients
- 1.5 lb all purpose flour
- 0.5 oz salt
- 1 lb butter
- 8 fluid ounces cold water
- Combine the flour and salt in a mixer. Add the butter and blend on medium speed with the dough hook attachment until pea-sized nuggets form, about 3 minutes. Add the water all at once and continue to mix until the dough just comes together.
- Here, I used my hands instead. I just worked the butter into the dry ingredients until I got those pea-sized nuggets of butter.
- Turn out the dough onto a lightly floured work surface. Scale the dough as desired. Wrap tightly and refrigerate for at least 1 hour before rolling. (The dough can be held under refrigeration or frozen).
**********************************************************************************************************
From what I gather, I get the impression
that most people are intimidated by pie dough. I've never given pie a second
thought before, so I had no preconceived notions coming into this. But
honestly, after you do it a couple times, it's probably going to be easier and
take less time to put this pie dough together than the time it takes to drive
on over to the store and find a pre-made pie dough. I'm not just saying that
either. Try it! Your taste buds will thank your efforts afterwards!
Now on to the good stuff! The blueberry pie
filling!
The recipe I use here called for frozen blueberries. It also called for blueberry juice from the thawed frozen blueberries, but you could substitute that for water. Here, I have some blueberry juice, sugar, salt, frozen blueberries, lemon juice and clear gel starch boiling in a pot. You would potentially have a problem finding clear gel starch in the store, so using an internet recipe for blueberry filling would be just fine instead- you'll probably just end up using a different thickening agent.
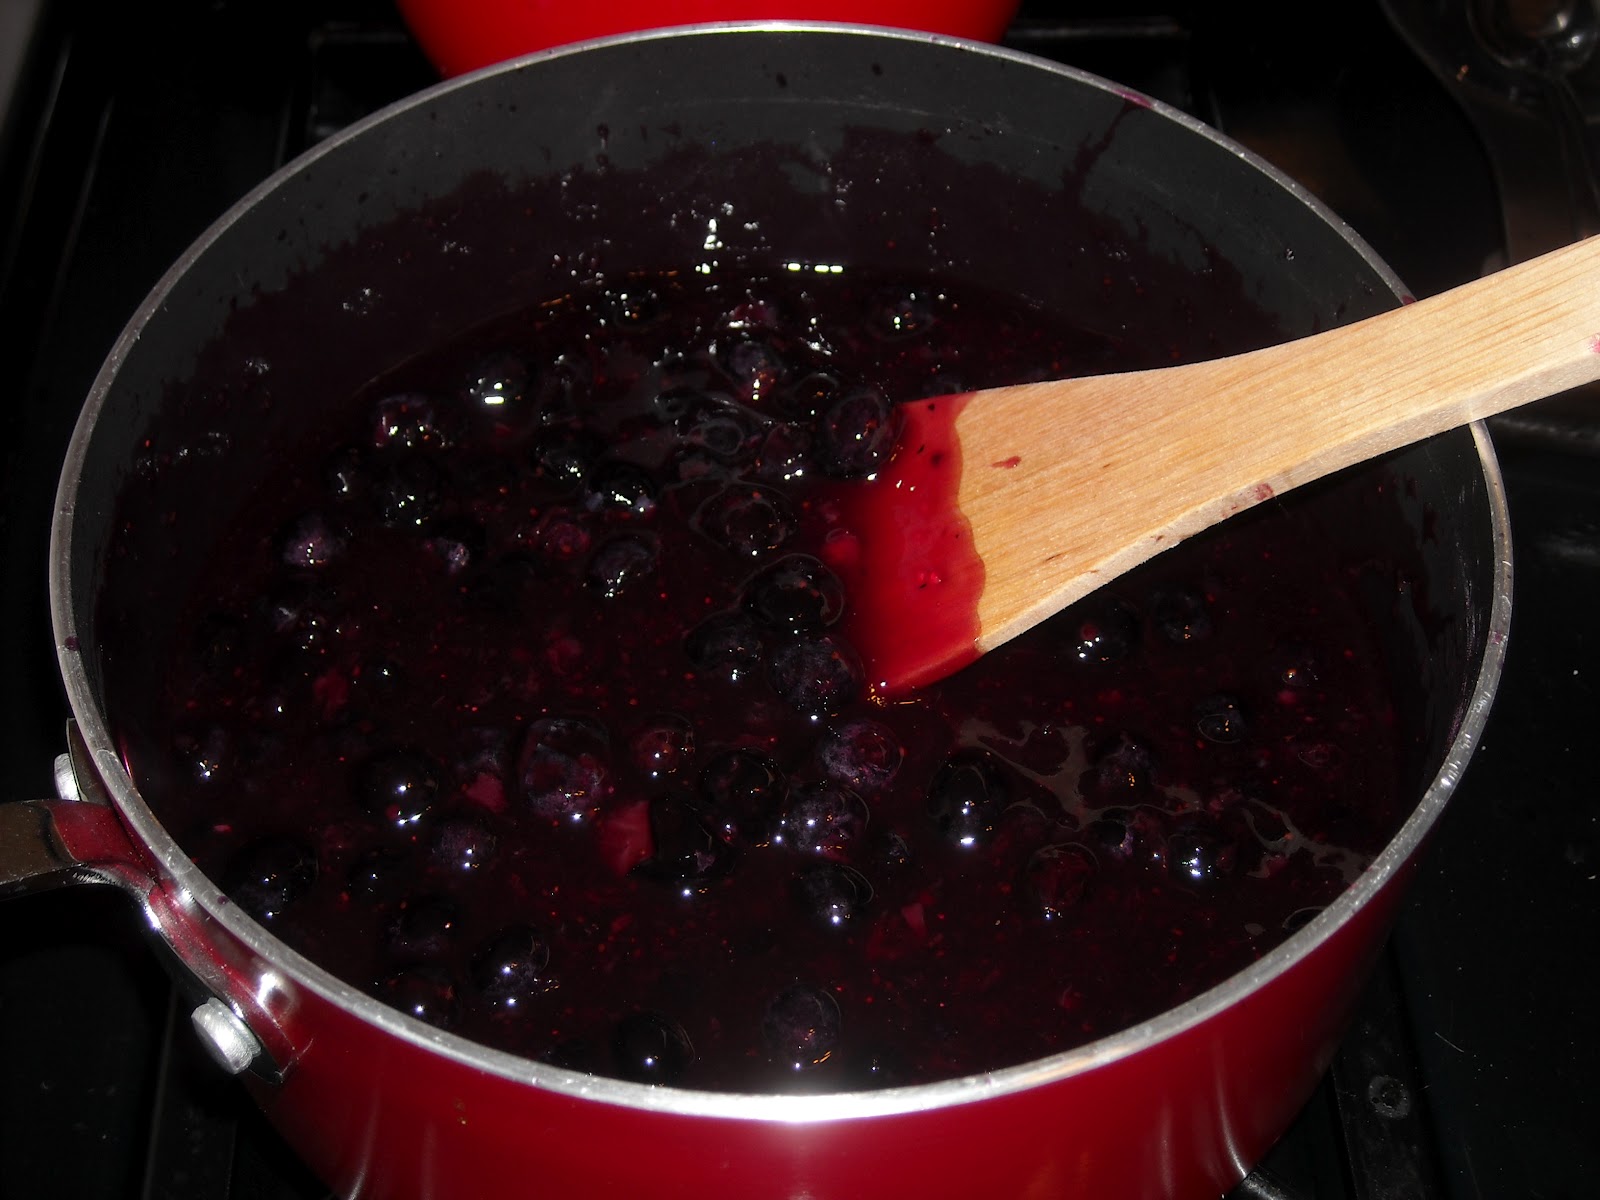
Once you're done cooking the blueberry mixture, you're going to want to let it cool completely before filling your pie shell. In the meantime, you can get busy setting up your lattice crust.
Take one hunk of that pie dough you wrapped up and saved and roll it on out. Here, I cut slices with a butter knife, about 1/2 inches wide.

Again, when the filling is completely cool, it's safe to pour the pie filling into the shell.

Then you'll want to carefully arrange those cut strips on top of the filling, like you see here below. From here, I picked up alternating strips one at a time, and weaved in the perpendicular strips...

And ended up with something like this! A messy, but decent first attempt.

Before popping your beauty in the oven, spread some egg wash on the crust with a pastry brush. This is just some eggs with a splash of water.
45 minutes later.......

.....ta-da!
You did it! You just made a blueberry pie! It looks gorgeous, I'm so proud of you, it's going to be so delicious!
***********************************************************************************************************
Blueberry Pie
makes 1 pie, 10 inches
Ingredients:
- 2/3 of basic pie dough recipe above
- 14 fluid ounces blueberry juice, drained from frozen berries (substituting water here is fine)
- 3.5 oz. sugar
- 1/4 tsp salt
- 1.375 oz clear gel starch
- 1.5lbs blueberries, drained, frozen
- 0.5 fluid ounces lemon juice
- egg wash as needed
- Roll out a single portion of dough, 1/8 inch/3mm thick and line the pie pan. Reserve the remaining dough, wrapped tightly, under refrigeration. (you'll want to grease the pans before adding the pie dough).
- Bring 12 fluid ounces of the blueberry juice, the sugar and salt to a boil in a sauce pan.
- Combine the remaining 2 ounces blueberry juice with the clear gel starch and mix until smooth.
- Add the starch mixture to the boiling juice, stirring constantly with a wooden spoon. Bring the mixture to a second boil. Boil for one minute.
- Add the blueberries and lemon juice; stir and cook for one minute, until the mixture thickens.
- Remove the mixture from the heat and cool completely.
- Roll out the second portion of dough 1/8 inch thick. Cut into strips 1/2 inch wide. Weave a lattice over the top of the pie, leaving a 1/2 inch space between each strip. Brush the lattice crust with egg wash.
- Bake the pies at 420 degrees F until the crust browns, about 45 minutes.
And now....enjoy!

@--,--
No comments:
Post a Comment